Certified Red Team Operator (CRTO) Review - 2023

\x01 Introduction
I know it's been a while since I posted here, but the second half of the year has been really busy! With that said, one of the things that kept me occupied was the Red Team Ops course by Daniel Duggan (RastaMouse). The course was fantastic, and the highlight for me was getting hands-on experience with Cobalt Strike, something I had never been able to do before now.
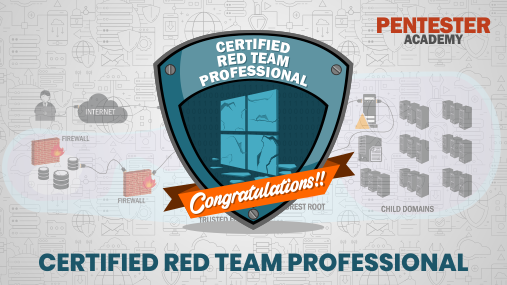
From the very beginning of 2023, when I was planning my goals for the year, one of my goals was to get the CRTO certification. And this week, I achieved that goal. I would like to share my thoughts, feedback, and suggestions about the course and exam to help others who are also considering jumping into the course.
The opportunity to gain hands-on experience with Cobalt Strike was invaluable, plus the added "challenge" of performing all of the TTPs through Cobalt Strike rather than native PowerShell. The emphasis on OPSEC throughout the entire course was a really nice addition as well. It's one thing to know how to perform a certain attack, but knowing what breadcrumbs you're leaving behind is another.
\x02 Course Pricing
So, I learned this the hard way: the course and lab time are no longer bundled together as they used to be. Previously, when you purchased the course, you would get 40 hours of lab time included.
This, however, is no longer the case. Now, the course and lab are separate items that you can purchase. Good thing I was talking with someone on Discord about the course when they brought that up to me.

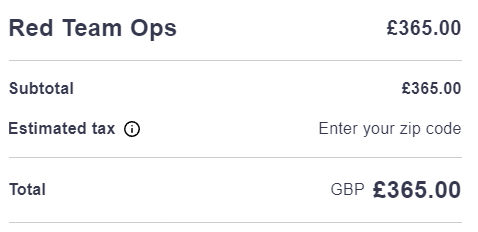
For the Red Team Ops course, the price when I bought it was £365.00, and you get the material for life. Not only this, but you also get future updates as Rasta makes changes to the course material - super cool!
As for the RTO lab, you get to choose how much time you want. Personally, I went for 180 days as I figured that was plenty of time to work through the lab a few times until I was comfortable with all of the attacks and playing around with different things not directly covered in the course.

Overall, I believe that the pricing for what you get is more than fair. The fact that you have access to the course material for life and receive future updates is fantastic, as it allows you to always refer back to and consult the material if needed for whatever reason.
With the pricing out of the way, let's talk about my thoughts on the course itself.
\x03 My Thoughts on the Course
Oh boy is there a lot of material covered in the course.
Rasta will walk you through the initial process of the engagement, which includes configuring your Cobalt Strike instance, creating and managing listeners, and generating various payloads. This part was really enjoyable for me because I had never used Cobalt Strike before, and being able to utilize it in the course was fantastic.
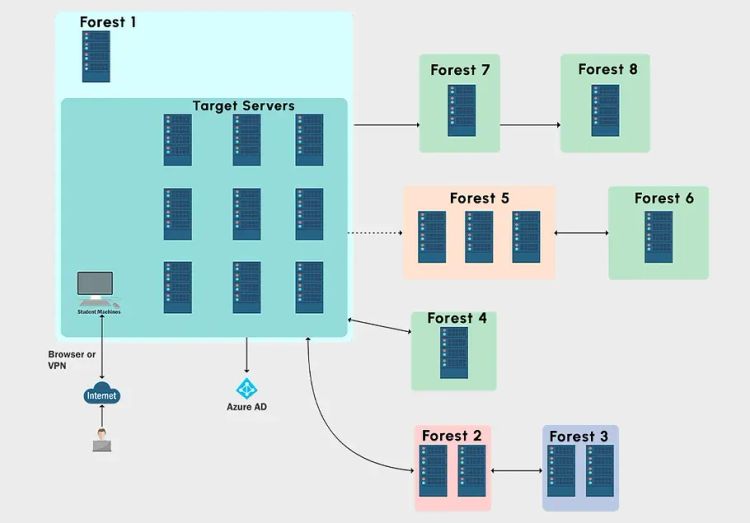
Once you've mastered the basics of Cobalt Strike, you will be guided through the entire attack lifecycle. This includes external reconnaissance, initial compromise, persistence, privilege escalation, credential dumping, lateral movement, pivoting, and domain dominance.
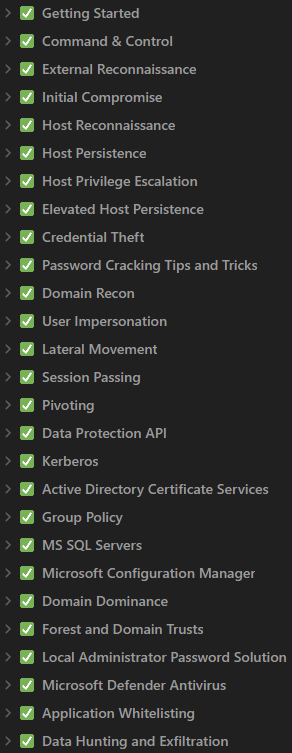
When it was all said and done, this was the primary outline of my notes - it's a lot of material to work through!
Some of the content, such as Kerberos, MSSQL servers, LAPS, and ADCS was not particularly new to me as they were previously covered in other courses like PNPT, CRTP, and CRTE. However, it was a great refresher as I worked through it. Having to do everything through CS added an extra twist that I really enjoyed.
At first, the most difficult thing for me to grasp conceptually was the idea of remote port forwards and pivot listeners. However, after drawing everything out and researching them more, I found myself really comfortable with them and actually knew how they worked and when to use each.
Throughout the various modules, Rasta will highlight different OPSEC considerations for you to keep in mind while performing the different attacks. Pay attention to these. Rasta not only demonstrates how to perform the attack itself but also provides context on performing them with OPSEC in mind. This helps prevent you from being excessively noisy on a network and be more aware of the breadcrumbs you've left behind for the blue team to detect you.
As I worked through the course, I noticed that some of the material covered wasn't included in the lab, such as abusing SCCM servers. Another issue was that one of the tools used for working with MSSQL servers didn't function as described in the course.
I discovered that I was using an older version of the lab instance as I was working through the lab, which did not include all the content covered in the course material. After completing the entire course, I went back to Snap Labs and upgraded the labs to the latest version. Make sure to do this before starting the course to ensure that you are working with the most up-to-date version.
The Labs
The RTO lab is more like a walkthrough lab rather than a challenge lab. In the sense that if you follow the course, you will do just fine in the labs. You aren't tossed in the labs and expected to figure everything out on your own.
The course will guide you through all of the various TTPs and allows you to emulate them on your own in the labs. There are a few cases where Rasta will suggest trying something on your own, and I highly recommend that you do so. It will only benefit you in the long run. Additionally, you get to play with Cobalt Strike even more - what's not to love about that?
The labs are managed through Snap Labs, which allows you to control each of the machines and access them via RDP if necessary. Instead of using a VPN, the labs rely on Apache Guacamole for access. While this took some time to get used to, it wasn't a deal breaker and didn't really negatively impact my experience. The advantage is that everything is pre-configured for you, and all the necessary tools covered in the course are already available on the attacking machine.
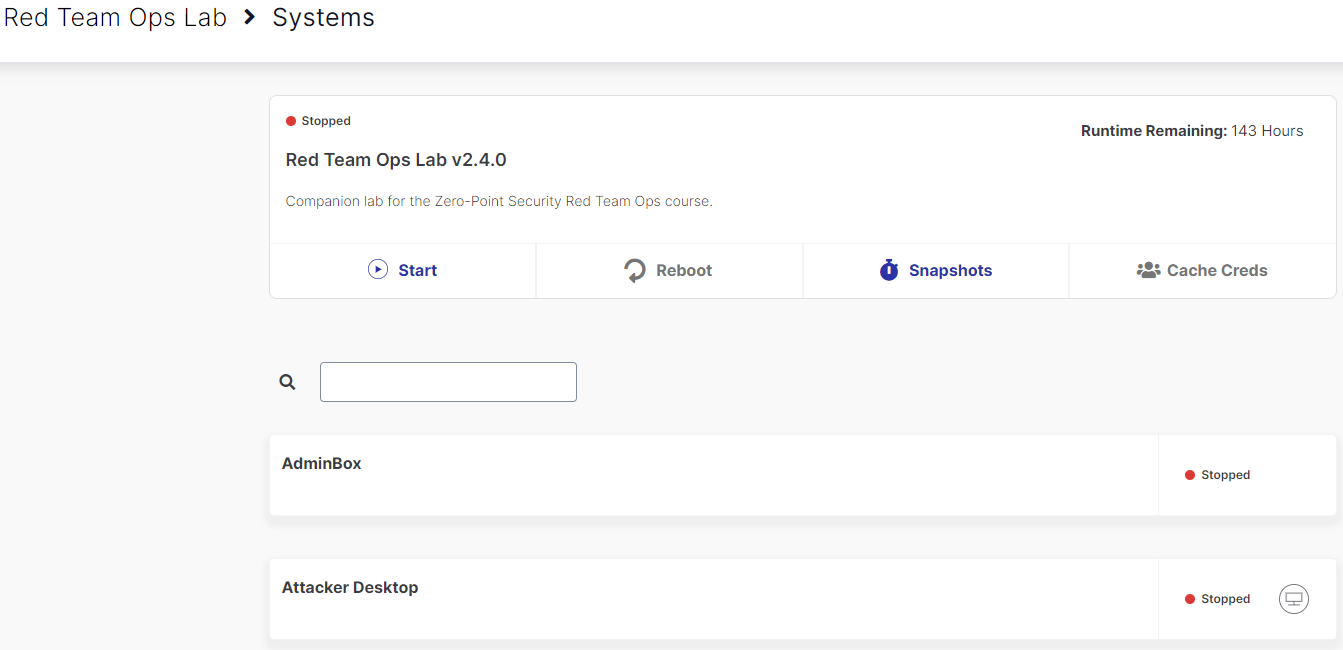
Make sure to stop the lab once you are finished working on it. You don't want to waste lab time when you aren't even using the environment!
When I went through the labs for the first time, I was more focused on translating the course material into my own words and not so much on creating cheat sheets. During my second run-through, I spent a lot of time refining my cheat sheets and frequently used commands for different types of attacks. This proved to be very, very helpful as I went through the exam!
There is also an ELK instance in the lab, so you can see, from a defensive perspective, how much noise you are making in the environment. I didn't spend too much time here as I was working through the lab, but I do plan on going back before my lab time expires to do a deeper dive.
This is a great addition to the course as it allows you to see your attacks from a defender's perspective and see what you can do differently to try to blend in a bit more. It's great to see this built-in because, yes, it's cool to break into stuff, but it's equally important to know what your attacks look like on the network and what you're leaving behind. This is red teaming, after all, not pentesting. You're trying to pick the lock, not bust the door down...
Potential Con?
While this wasn't really an issue for me once I got used to it, the reliance on Apache Guacamole can be a turn-off for some people who are familiar with using a VPN to access a lab environment. I understand why Rasta had to configure the lab (and exam) this way, but it's something worth mentioning.
It did take a minute to get used to the shortcut combination to copy and paste from and to the Guacamole environment, but again, you get used to this. It's not as bad once you get used to it.
Defender? Prepare for battle!
One of my biggest tips is to revert the entire lab instance once you have completed it and then go through it again with Defender enabled. During the initial run-through of the lab, Defender and other protections are disabled. This allows you to really gain a fundamental understanding of each of the TTPs without the added challenge of trying to bypass various defenses. Credential dumping, post-exploitation, and lateral movement will be accepted without too much trouble.
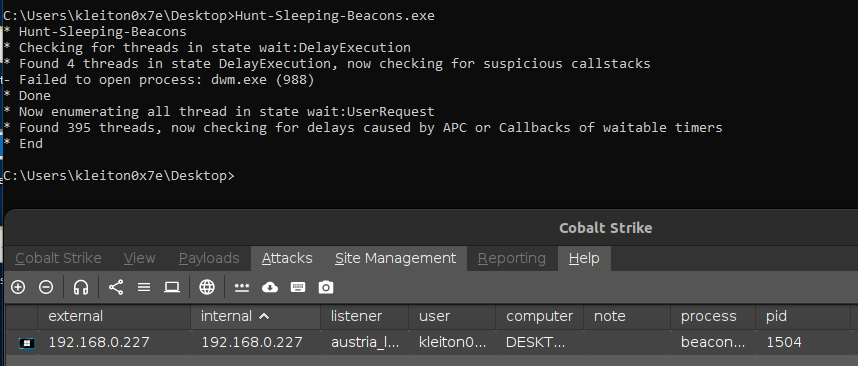
However, during the exam, you will need to contend with Defender. It is important to understand what changes you need to make to your payloads and testing methodology in order to avoid detection by Defender and thus lose beacons in the process. I spent a considerable amount of time in the labs really honing in my bypasses. The amount of times I ran Get-MpThreatDetection was insane but it taught me what I could and could not run and how I was being caught.
Dial in your profile and kits!
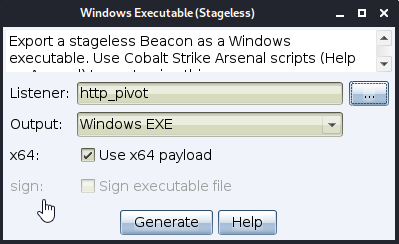
The course covers various techniques for bypassing Defender, and one of these is the arsenal kit for Cobalt Strike. Here, you get to use the Artifact Kit and Resource Kit to control how your executables, DLLs, and scripts operate on a host and, hopefully, bypass protections.
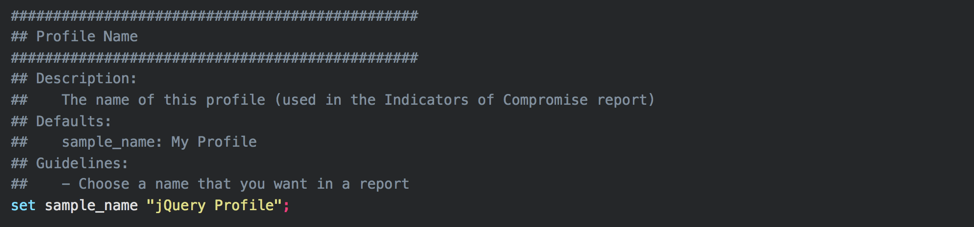
Rasta also explains what to include in your Malleable C2 profile in order to stay under the radar as much as possible and how to modify some of Cobalt Strike's default behaviors in a way that remains undetected by Defender, both in memory and on disk.
My biggest suggestion is that you spend a lot of time perfecting your Malleable C2 profile and kits before running through the lab again with Defender enabled. This will allow you to thoroughly test your changes and ensure that you don't inadvertently break any functionality and that you can avoid tipping off Defender.
Take note of the changes you make to your profile and kits as you will need to replicate them in the exam environment.
\x04 The Exam Experience
Once you feel prepared for the exam, it's time to schedule it! There is an exam booking page that is linked at the end of the course, which you can use to schedule the exam. There were plenty of openings to choose from, so trying to find an open slot wasn't an issue for me.
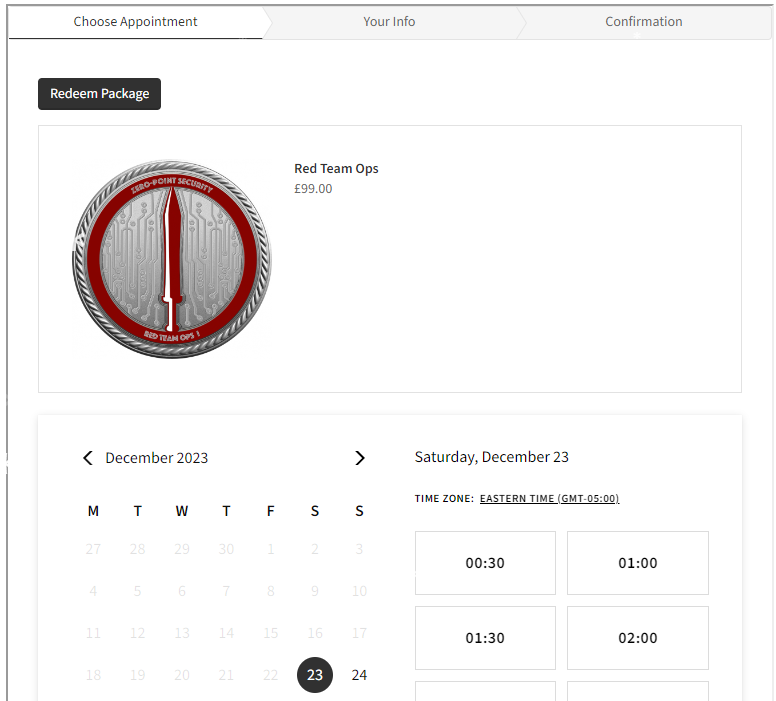
When you book your exam slot, you will receive a threat profile which outlines the various aspects of the exam and what you need to achieve in order to pass.
You have a total of 48 hours spread across four days to use as you wish in the exam environment. If you want to hack for 48 hours continuously, feel free. If you prefer to split the time over multiple days, you can do so. The exam is also not proctored, which is a bonus for me. You are free to start and stop the exam environment as you see fit to conserve time on breaks or sleep periods, but remember that, just like in the labs, you will lose beacons if you stop the environment.
In order to pass, you need to submit 6 out of 8 flags in the scoring portal as proof of your progress. There is no reporting requirement, so as long as you submit enough flags, you pass! If you have enough points to pass by 2AM UTC time, you will receive your badge via email.
I scheduled my exam for 10 AM. However, I didn't actually start my exam until 10:30 AM-ish because I was still eating my breakfast. I wasn't in a rush, as you could tell. Once I did start, I made sure to configure my team server, upload my malleable C2, and dial in the kits. This was pretty quick for me because I made sure to dial all of this in during my lab and took good notes that I could copypasta.
It took me approximately 3 hours and 45 minutes to earn enough points to pass the exam. I did spend some time trying to obtain the last two flags, but I was unable to get them. I had a fairly good understanding of what I needed to do, but just couldn't make it happen.
The exam was extremely fair, and everything you need to pass is covered in the course. There is no guess work here. That doesn't mean you can just directly copy/paste commands from the course and expect them to work on the exam, but if you understand the various TTPs, you will do just fine on the exam.
Aside from a small hiccup at the beginning of the exam, the environment was very stable for me, and none of my beacons died throughout the course of the exam. I did encounter a problem with one of them, but I believe it was due to my own error rather than a fault with the environment itself. It was probably a layer 8 issue 🤷♂️
Points for Success
- Run through the labs with Defender enabled and make sure you can bypass AMSI, memory detections, and on disk detections.
- Dial in your Malleable C2 profile and make sure to use C2lint to ensure you don't have any mistakes in your profile.
- Work on building your artifact and resource kit in the labs to ensure your changes work and can successfully bypass detection.
- Have really solid notes. You need to actually understand the various attacks and know when to use a certain attack and what it's used for.
\x05 Wrapping Up
Overall, I loved the course and the exam. The most enjoyable part was getting hands on experience with Cobalt Strike, and performing all of the TTPs through it was a nice change from doing everything in PowerShell like in CRTP and CRTE. Cobalt Strike is extremely powerful once you become familiar with it and know how to fully utilize everything it can do. It was a bit overwhelming at first, but I quickly adapted to it.
I would highly recommend this course to anyone looking to level up their Active Directory game and dive into red teaming. I feel CRTO would be perfect for someone who has just completed their OSCP or looking to continue from other certifications like PNPT and CRTP.
I also feel that this course would be perfect for anyone wanting to get their hands on Cobalt Strike. Unless you use it during actual red team engagements, you probably won't find another way to play around with it. CRTO will let you do just that. It's awesome!
\x06 Helpful Resources
Helpful when creating custom malleable C2 profiles
Detailed guide that breaks down each part of the malleable C2 profile

Additional information on malleable C2 profiles
 Peco602
Really nice persistence aggressor script I used
Understanding pivoting a bit more
If you are planning on going through CRTO as well, all the best!
Until next time, thank you for reading this review!