Reporting Made Easy: A Beginner's Guide to Report Ranger

Introduction
Let's face it, not many of us enjoy writing a penetration testing report. If you're one of those rare people who do, kudos to you. For the rest of us, however, we can make the process a bit less daunting. But how?
If you've read my CRTP and CRTE course reviews, you may have noticed that I kept referencing Report Ranger when discussing the writing of my exam report. Over the years, I've used various tools to write reports, but none of them worked for me quite the way I wanted them to. That was until I came across Report Ranger from the team at Volkis.
Report Ranger is a report generation tool that simplifies reporting by taking care of everything else for you. With Report Ranger, all you need to worry about is the writing itself.
Report Ranger is a simple tool. You write files in Markdown, and it will automatically order the findings based on criticality. It also sorts the files based on types of engagements, such as external and internal engagements. For more details on how Report Ranger works, check out the playlist linked below by Volkis 👇
I'm a big fan of Report Ranger, and I want to make it easy for others to get started. In this post, I'll walk you through the installation steps and post-installation configuration, so you can be up and running in no time. I installed Report Ranger in its own standalone virtual machine, but you can also install it alongside your primary virtual machine (Kali or something else).
I want to be upfront and say that this is a long post. I apologize for that, but I wanted to provide as much detail as possible to help you get the installation and report generation up and running. Once you have a basic understanding of how to use Report Ranger, I encourage you to review the Report Ranger wiki on your own to gain a better understanding of the tool's capabilities and how to further customize reports 👇

Installation Testing and Validation
This guide will walk you through the installation and configuration process on a fresh Ubuntu 22.04.2 virtual machine. I have personally followed these installation steps end-to-end and they have worked as expected. I tried to install Report Ranger inside of Kali Linux and ran into many problems that would be impossible to account for when it comes to the different versions of Kali.
If you want to install this outside of a separate VM, please be aware that it will probably require individual troubleshooting that is beyond the scope of this write-up. Please do so at your own risk!
1. The Installation
There are a lot of moving parts when installing Report Ranger and if anything goes sideways along the way, you need to have a way to roll back to a known good state.
1.1 Installing Dependencies
To begin using Report Ranger, you need to install a few requirements. If you don't have them already installed, don't worry. Run the following command to install all of the dependencies in one fell swoop. If you already have some of these packages, apt will just skip it.
sudo apt update && sudo apt install -y python3 python3-pip pandoc texlive git python3.10-venv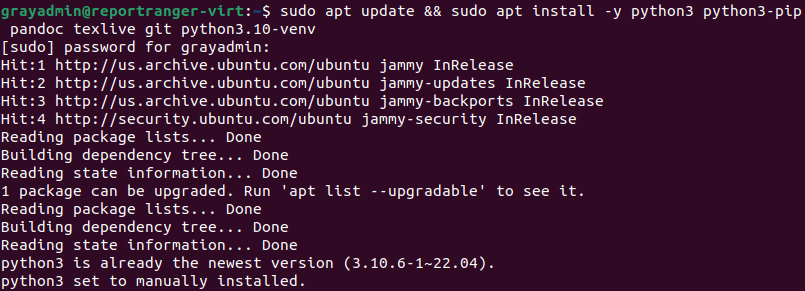
1.2 Installing pipx
pipx is a Python package manager that installs packages within a virtual environment. We will use pipx to manage the installation of pipenv and Poetry, both of which will be used throughout the installation process.
python3 -m pip install --user pipx
Command Not Found?
If you receive a "command not found" message when running pipx after step 1.2, it is likely that the Python base package directory is not in your current path. If this is the case, run the following command to get the package directory.
python3 -m site --user-baseModify your respective shell's RC file (e.g. ~/.bashrc or ~/.zshrc) and add the following line to the file. Make sure to append /bin to the end, which is where Python packages like pipenv reside.
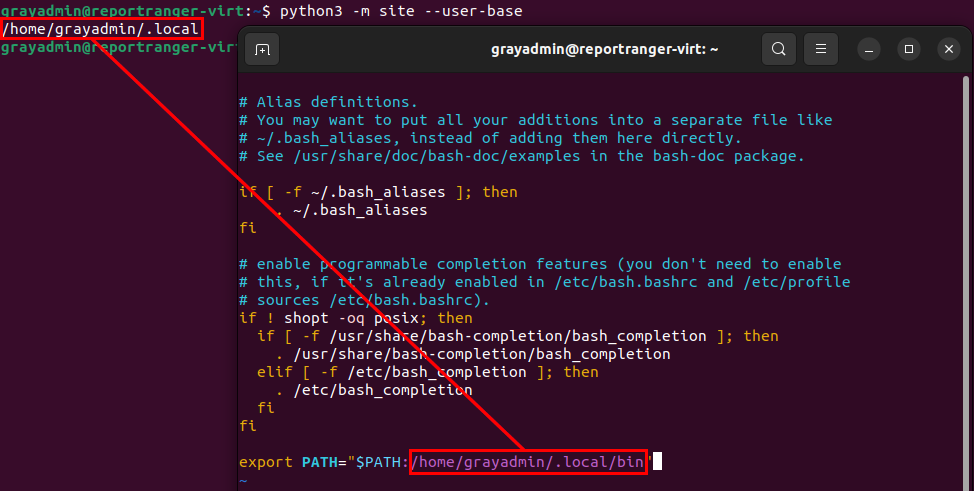
After making the change, run source ~/.bashrc or source ~/.zshrc (depending on your shell). After sourcing, you should now be able to run pipx
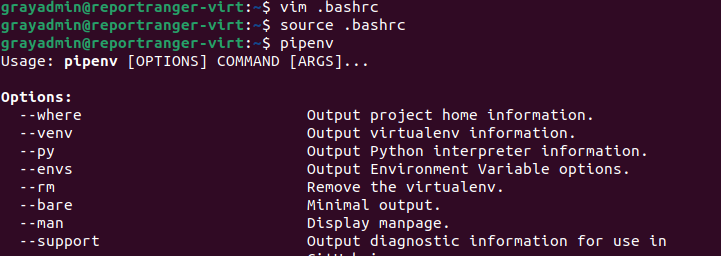
1.3 Installing pipenv
We’re going to install pipenv using pipx which will allow us to manage virtual environments - which is the method Report Ranger is going to be installed.
pipx install pipenv
1.4 Installing poetry
Report Ranger uses Poetry to specify which packages (and their versions) to use inside the virtual environment. To use Poetry, we need to install it using pipx. This is a simple installation process, similar to pipenv, and can be done with the following command:
pipx install poetry
1.5 Installing Additional LaTeX Packages
Report Ranger relies on LaTeX for report generation. To install the necessary add-ons required for the report generation process, you need to install texlive-latex-extra and texlive-fonts-extra.
sudo apt install texlive-latex-extra texlive-fonts-extra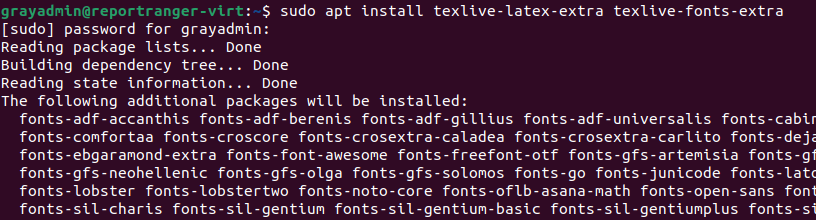
2. Installing Report Ranger
Once we have all the dependencies set up, it's time to install Report Ranger. To begin, let's clone the repository, and then use Poetry to install all the necessary Python dependencies within a virtual environment. I personally choose to clone the repository in my Documents directory, but you can clone it wherever works best for you.
## Clone the repo
git clone https://gitlab.com/volkis/report-ranger

## Change into the cloned directory
cd report-ranger

## Poetry to install the Python packages & dependencies
poetry install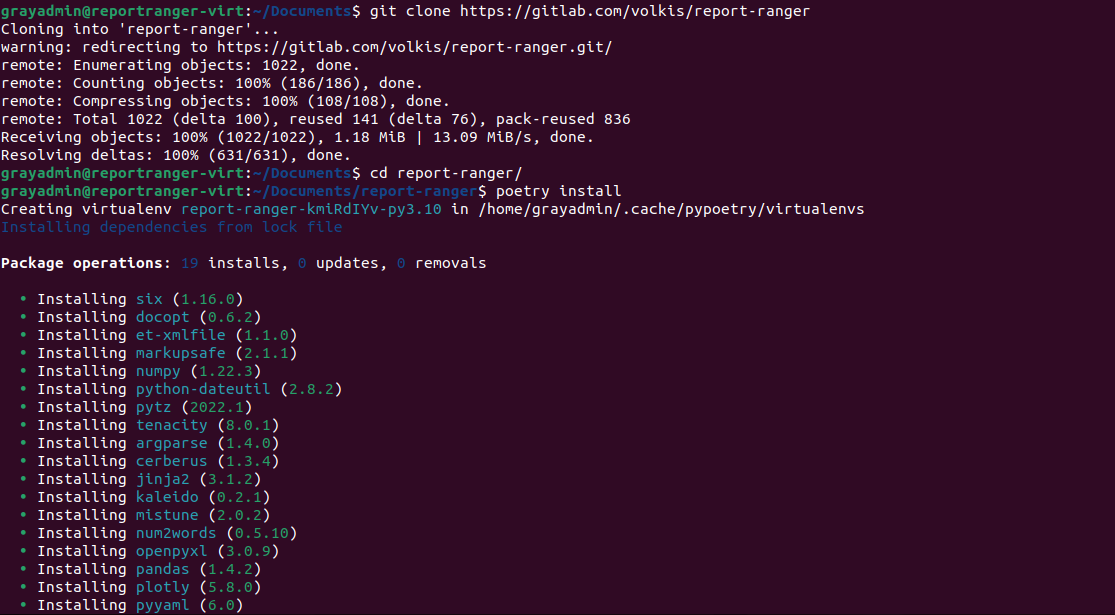
After Poetry finishes installing everything, we can proceed to configure Report Ranger before attempting to run it. Don't worry, it's a straightforward process!
3. Configuring Report Ranger
Before we begin writing our report, we need to do a bit of configuration. Out of the box, things will not work, as there are hard-coded paths in the configuration file that are unlikely to match your setup.
Before we do anything, you need to get familiar with the directory structure of Report Ranger as the configuration we’re about to make will make more sense. Inside the main report-ranger directory, you will find a few other directories - mainly report_ranger and sample.

The first thing we need to do is locate our template directory. This is what Report Ranger will reference when generating your report. In this directory, you can specify various attributes of your report, such as colors, page backgrounds, logos, and default variables, and other LaTeX items. To use the template, we need to modify a configuration file and reference the path to the template. Without this step, the generator will most likely fail as it is looking for a template that does not exist in the directory it is expecting.
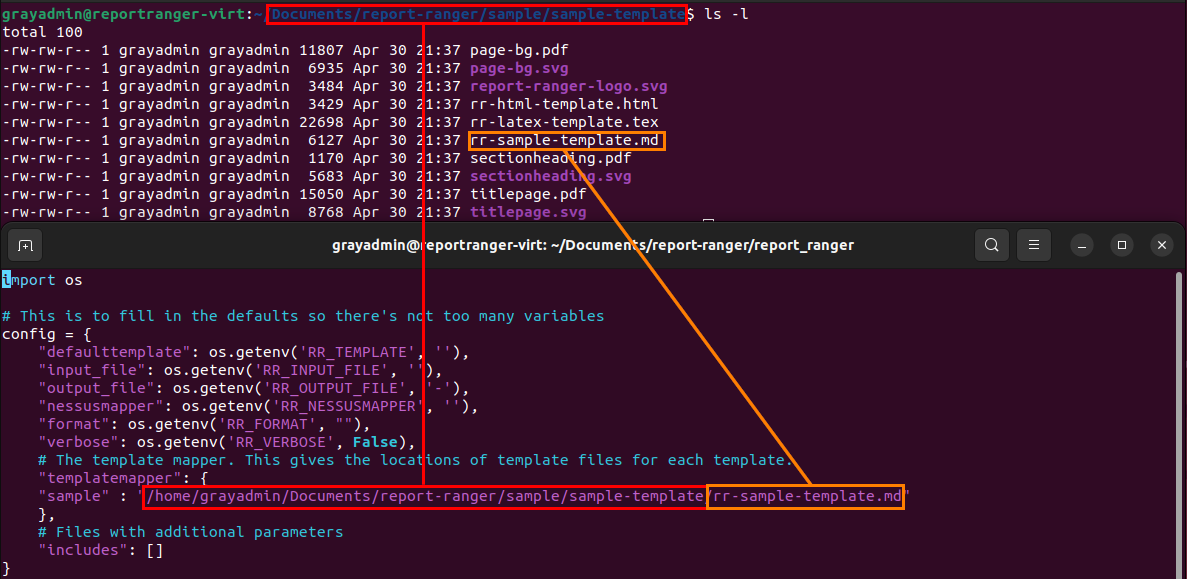
Out of the box, there is a sample template for you to use. This is located at the following path: ./sample/sample-template/rr-sample-template.md.

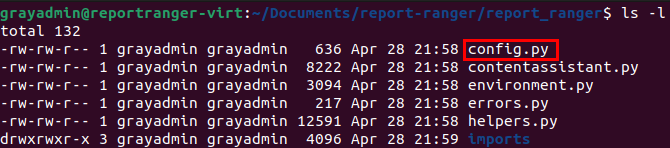
Now that we know where the sample template files are, we need to modify the configuration file to tell Report Ranger the same thing - where the template files for each template are! The configuration file is located at ./report_ranger/config.py.
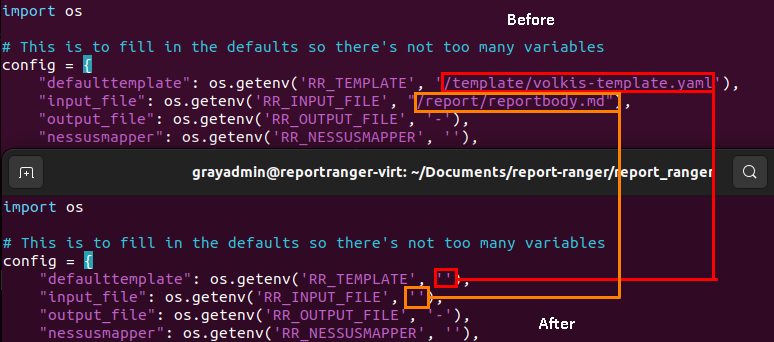
In the configuration file, we can remove the hard-coded paths for defaulttemplate and input_file. To do this, simply delete everything between the single quotes. Once you become more familiar with Report Ranger and how it works, feel free to set these again. But for now, we don't really need them, as they can be specified at runtime.
While still in config.py, we need to modify the templatemapper value and add in the following:
"sample" : "/home/grayadmin/Documents/report-ranger/sample/sample-template/rr-sample-template.md"How did I know to map to the sample template? I'll explain it a bit later, but for now, just press the "I believe" button. In this step, include the full path to the sample template directory from earlier and append the name of the template markdown file. After you're done - save your changes to config.py.
4. Going Over Sample Report
In the previous step, I told you to press the “I believe button” when it came to the name of the template to use. Now, this is where you find out where that came from. First, navigate up one directory, and instead of going to sample-template (which was the directory we were just in) instead, go to sample-report.
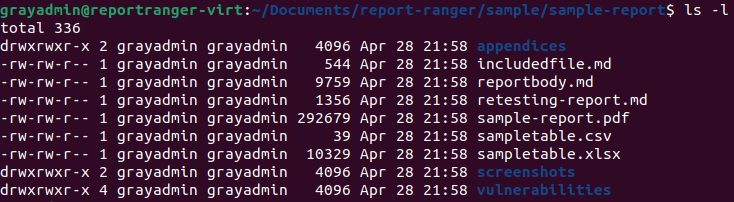
This directory structure is similar to what yours will look like. This is a sample report provided as an example. Within this directory, we have the following items:
- reportbody.md - This is the bulk of your report. This file contains the text that you want to include in the report, such as an executive summary and scope. There will also be placeholders for things like included files and vulnerabilities.
- screenshots - This is self-explanatory. Place your screenshots here, and they will be referenced by Report Ranger when generating your report.
- vulnerabilities - This will house your individual findings each with their own markdown file. This directory is referenced directly in the report. All you need to do is create a new markdown file for each finding and Report Ranger will do the rest.
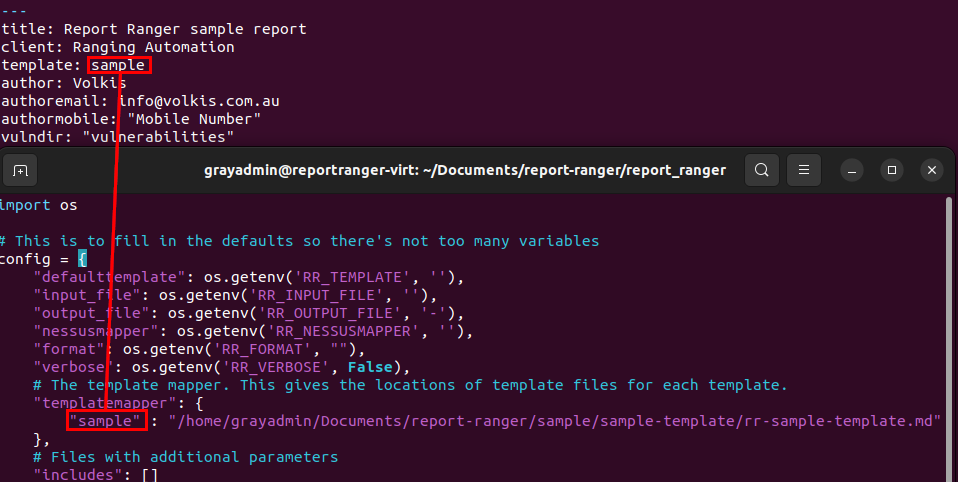
If you open reportbody.md in a text editor, you will see a value in the YAML header called template. Take note of what it is set to - sample. Look familiar? This corresponds to the template we set earlier. This is included in the report body because you can have multiple templates, and then specify which one to use for your report with this setting.
What does this mean? Well, you can have multiple templates defined in config.py , and then on a per-report basis, tell Report Ranger what template to use when generating the report. Neat!
Moving on from the report body, another important directory is "vulnerabilities". This directory contains the actual findings for your report. Each finding is assigned to its own markdown file, which Report Ranger processes when generating your report. Additionally, you can create child directories to categorize different types of engagements, such as external and internal. These directories enable Report Ranger to use them as different sections in your report, sorting findings within them separately from the others.

I won't go into too much detail about this because the YouTube playlist linked at the beginning of this post covers everything in much better detail.
5. Generating Your Report
To keep things short, let's pretend that the contents of "sample-report" are the findings and screenshots for the report you've been working on for a client or an exam. Does that sound good? Great.
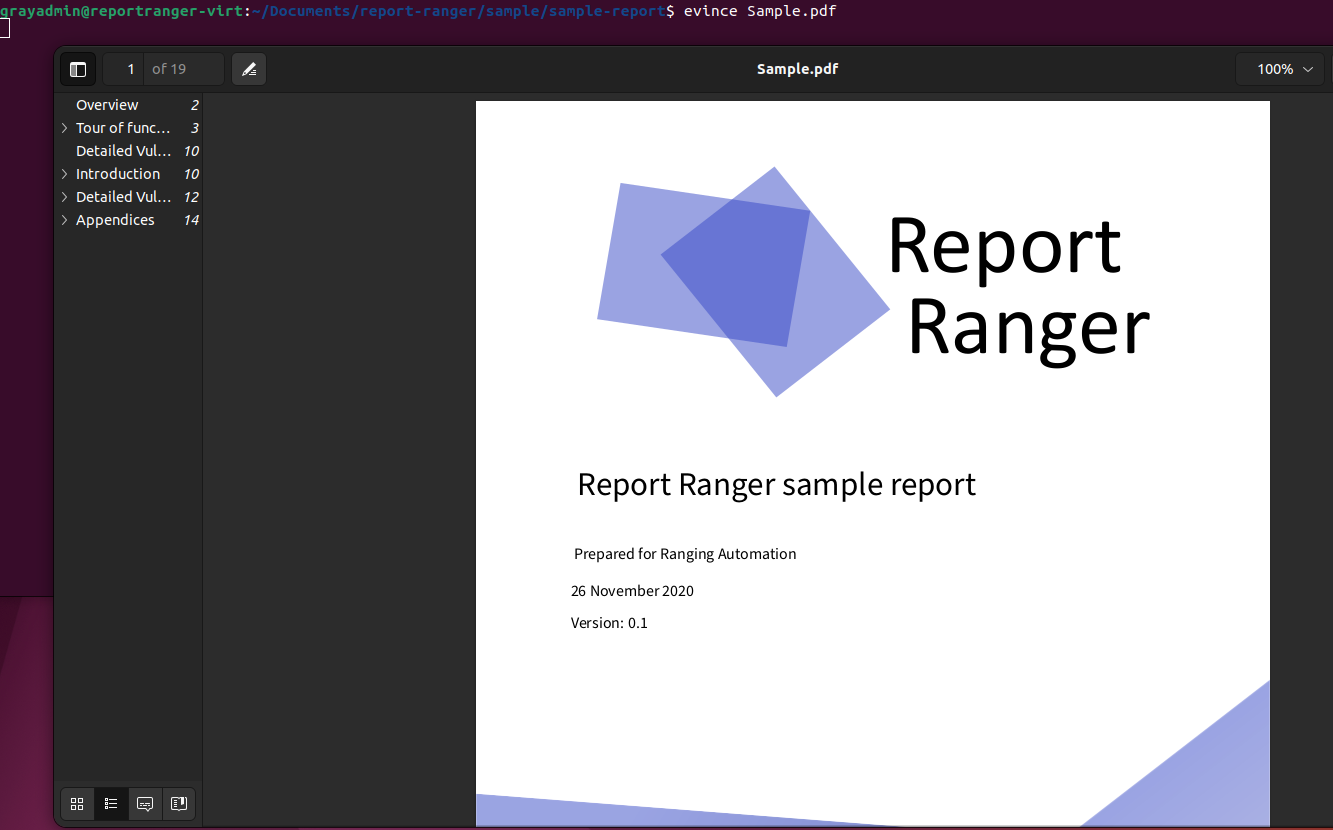
Once you have everything set up, you just need to use Poetry to run reportranger.py from the root Report Ranger directory. For simplicity, I will execute this from within the "sample-report" directory. I normally do this as I want to keep my final PDF with the rest of the files that made up the report.
In my example, I am referencing reportranger.py by a relative path. However, you would use the appropriate path for your setup.
-i -- This is the input file (reportbody.md)
-o -- This is the output file

poetry run python3 ../../reportranger.py -i reportbody.md -o Sample.pdf
Once done, we can use evince to view the PDF version of our report!
6. Next Steps
Congratulations on completing the basic installation, configuration, and report generation! Now that you have a basic understanding of how to use Report Ranger, I encourage you to review the Report Ranger wiki to learn more about the tool's capabilities. The wiki contains a wealth of information, including documentation on more advanced uses and things to include in your report.
After becoming familiar with the templating mechanism, you can create your own unique templates! You'll be able to modify various elements, such as logos, title page colors, and text formatting. I actually did this myself for my own reporting purposes. I started with the sample template and customized it to my needs by incorporating my own design and colors. You can easily include your personalized template in the config.py file and refer to it in the YAML header in reportbody.md.
If you want to know more about what's coming down the pipeline with Report Ranger, check out the roadmap 👇
Thank you for sticking with me throughout this long post. I hope it helped you install and run Report Ranger for your next reporting project. Don't forget to check out the YouTube playlist and the wiki to plan your next steps with the tool 👇
Changelog
5/8/2023 - A disclaimer has been added to state that Report Ranger should only be installed inside a separate Ubuntu virtual machine. This is due to conflicts with other operating systems, such as Kali Linux.